Set up VPN with transparent proxy on DigitalOcean

Recently I just rent a VPS on Digital Ocean, which is cheap for a student and who is price sensitive. As it gives you all the controls of an OS, it likes a remote compute machine. Meanwhile, you could do anything as you have your own server.
Therefore, it comes to my mind to create a VPN server. VPN is a virtual private network that extends a private network across a public network, which usually used to bypass firewalls or increase access speed. Proxy is a server that acts as an intermediary for requests from clients seeking resources from other servers. It needs to be set in software application’s configuration. VPN and Proxy both could hide your ip. The differences between them are listed following:
| VPN | Proxy | |
|---|---|---|
| Protocols | Support any Protocols | Support certain Protocols, such as HTTP, SOCKS |
| Softwares | Any softwares that can run on the machine | Softwares support proxy configuration |
| Price | High if you rent from vpn provider | Low |
| Speed | Varies depend on number of users usually depends on servers |
Depend on servers |
| Security | Encryption (128-bit to 2048-bit) | Not encrypted |
Because of the encryption, every accesses through VPN retrive the objects directly from the source. This could slow down the user experience when hits a same object multiple times, such as icons in a webpage. If there is a way that could cache web objects into VPN server, that will significantly increase the access speed, which get objects from local disk instead of downloading from source website. Here, I should introduce the transparent proxy, which usually sets on the gateway and caches content from WWW requests. It calls transparent because client side does not need any configuration. Hence, every WWW requests through VPN need go to transparent proxy.
This installation guide is tested on Ubuntu 14.04 64bit. VPN is set up by pptp. Transparent proxy is on Squid3.
- pptp installation
In terminal, type the command bellow to install pptp server:
sudo apt-get install pptpd
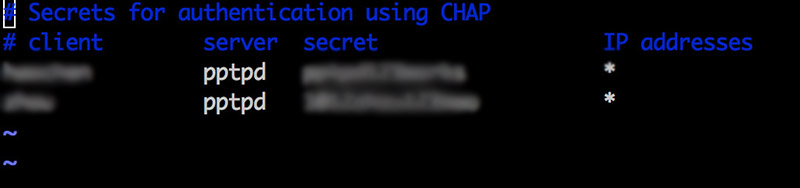
To restrict user access your VPN server, you also need to add users and passwords in /etc/ppp/chap-secets.
In the client column is user’s name, the secret column is for passwords.
I masked mine for privacy.
Add the following DNS to /etc/ppp/pptpd-options:
ms-dns 8.8.8.8
ms-dns 8.8.4.4
Restart pptp server by command service pptpd restart. Check if it is running by netstat -alpn | grep :1723.
You also should enable the IP forwarding on your pptp server.
This would transfer the package between public ip and private ips on your server.
Open /etc/sysctl.conf, add the following line if not exist: net.ipv4.ip_forward = 1.
Then run sysctl -p to make the change effective.
Create NAT rule for iptables, and your VPN is ready to use:
iptables --table nat --append POSTROUTING -o eth0 -j MASQUERADE && iptables-save
- Squid3 installation
Similar to pptpd, typing the following in terminal:
sudo apt-get install squid
update-rc.d squid3 defaults
The proxy is usable now, but it is the normal proxy with default settings.
To change it to transparent proxy, we need to edit the /etc/squid3/squid.conf file.
The squid.conf follows the rules of allow/deny order.
It obeys the first come first serve, the first matched rule will apply.
For example, if you put “deny all” at the first line of squid.conf, then the proxy denies all request.
If a rule does not indicate in squid.conf, then it defaults as deny.
First, find the line http_port 3128, change it to http_port 3128 transparent.
this is important
Second, add the following rules:
acl myhost src 192.168.0.1
http_access allow myhost
acl mymachine src 10.0.0.0/16
http_access allow mymachine
The ‘192.168.0.1’ is my public ip, and the ‘10.0.0.0/16’ is my private ips.
Restart squid sudo service squid3 restart.
Finally, we set the iptables to redirect all the traffic through 80 port to 3128 port that is our transparent proxy.
iptables -t nat -A PREROUTING -i ppp0 -p tcp -m tcp --dport 80 -j REDIRECT --to-port 3128
The transparent proxy is set up.
- Restore iptables rules while system start up
Right now, you couldn’t restart the system, otherwise the iptables will be set to empty again. But you can input the previous iptables commands again to solve this.
Here I introduce a method that will do it once and for all.
Save iptables into /etc/network/iptables.rules by iptables-save > /etc/network/iptables.rules
Open /etc/rc.local and add the following line before “exit 0”:
/sbin/iptables-restore < /etc/network/iptables.rules
Then our saved iptables rules will be loaded every time the system start up.
Enjoy your VPN server with transparent proxy!